Table Of Contents
- Introduction
- What You’ll Need
- Step 1: Setting Up Your Slack Workspace
- Step 2: Creating Your AI Application in Estha
- Step 3: Connecting Your Slackbot to Slack
- Step 4: Customizing Your AI Slackbot’s Capabilities
- Step 5: Testing and Refining Your Slackbot
- Real-World Applications for Your AI Slackbot
- Troubleshooting Common Issues
- Conclusion
Imagine having your own AI assistant working tirelessly in Slack, answering questions, automating tasks, and making your team more productive. Just a few years ago, creating such a tool would require extensive coding knowledge, AI expertise, and days (if not weeks) of development time. But today? You can build a powerful AI Slackbot in just 30 minutes—without writing a single line of code.
In this hands-on guide, we’ll walk through the process of creating your own custom AI Slackbot using Estha’s no-code platform. Whether you’re looking to build a customer service assistant, a knowledge base for your team, or a tool to automate repetitive tasks, this tutorial will get you up and running with a functional AI Slackbot faster than you can order and eat lunch.
The best part? No technical background required. If you can drag, drop, and link elements together, you have all the skills needed to create a sophisticated AI application that integrates seamlessly with Slack. Let’s dive in and transform how your team works with the power of accessible AI!
Build Your Own AI Slackbot in 30 Minutes
No Coding Required – Just Drag, Drop & Link
Minutes to Your Custom AI Assistant
Create a powerful, customized AI bot without technical skills
5-Step Process
Setup Slack
Create test channel & generate API credentials
Create AI App
Define knowledge base & bot personality
Connect to Slack
Integrate & set activation parameters
Add Capabilities
Customize skills & create workflows
Test & Refine
Verify responses & deploy to team
What You’ll Need
Slack workspace (admin access)
Estha account (free beta)
Basic idea for your bot
30 minutes of free time
Real-World Applications
Customer Support
Handle common questions & route complex issues
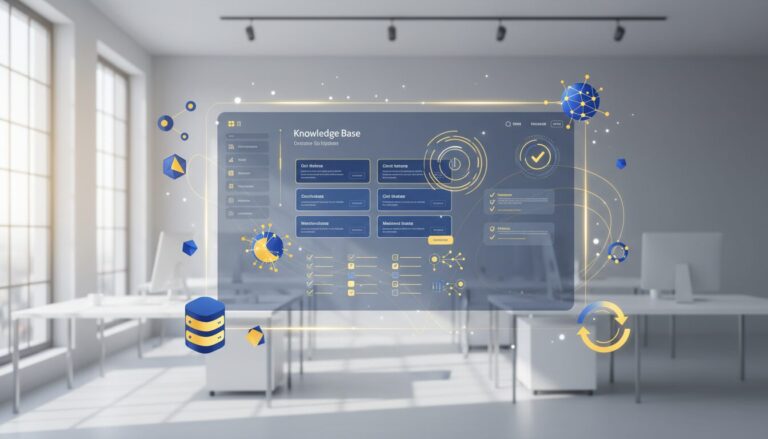
Knowledge Base
Instant answers to team questions
Meeting Helper
Take notes & distribute action items
Onboarding
Guide new team members through processes
Ready to build your own AI Slackbot?
Start creating in minutes – no coding required.
What You’ll Need
Before we start building our AI Slackbot, let’s make sure you have everything ready:
- A Slack workspace where you have admin privileges (or permission to add apps)
- An Estha account (you can sign up for the beta here if you don’t have one)
- A basic idea of what you want your Slackbot to do
- 30 minutes of uninterrupted time
That’s it! No coding environment, no AI training datasets, and no technical prerequisites. Estha’s platform handles all the complex technology behind the scenes, allowing you to focus on creating something useful for your specific needs.
Step 1: Setting Up Your Slack Workspace (5 minutes)
First, we need to prepare your Slack workspace to receive the AI bot you’re about to create:
Create a Dedicated Channel
While your AI Slackbot can work across multiple channels, it’s helpful to start with a dedicated testing channel:
1. Open your Slack workspace and click on the ‘+’ icon next to ‘Channels’ in the sidebar
2. Name your channel something descriptive like “ai-bot-testing”
3. Add a description explaining the channel’s purpose
4. Set the channel to private if you’re just testing
5. Invite team members who will help test the bot
Generate Slack API Credentials
To connect your soon-to-be-created AI bot with Slack, you’ll need to create an application in Slack’s developer portal:
1. Visit api.slack.com/apps and sign in with your Slack credentials
2. Click “Create New App” and select “From scratch”
3. Give your app a name (e.g., “My AI Assistant”) and select your workspace
4. Under “Basic Information,” note your Client ID and Client Secret (we’ll need these later)
5. Navigate to “OAuth & Permissions” and add the following Bot Token Scopes:
– chat:write
– channels:history
– app_mentions:read
– reactions:write
6. Save your changes
Don’t worry if this seems technical—it’s the most complex part of the process, and you’re just copying and pasting credentials. Once complete, your Slack workspace is ready to welcome your custom AI bot!
Step 2: Creating Your AI Application in Estha (10 minutes)
Now for the fun part—building your AI application in Estha’s intuitive no-code environment:
Set Up Your Estha Project
1. Log in to your Estha account at https://studio.estha.ai/
2. Click on “New Project” and select “Slackbot” from the template options
3. Name your project (e.g., “Team Assistant Bot”)
4. You’ll be taken to the Estha Studio editor with a pre-configured Slackbot template
Define Your Bot’s Knowledge Base
This is where you’ll determine what your AI Slackbot knows and how it can help users:
1. In the Estha editor, locate the “Knowledge” section
2. You have several options for adding knowledge:
– Direct text entry: Type information directly into the knowledge editor
– File upload: Upload PDFs, documents, or spreadsheets containing relevant information
– Website import: Enter URLs for websites containing information you want your bot to know
– Database connection: Connect to existing databases for dynamic information access
For this tutorial, let’s start simple with direct text entry. Add relevant information your bot should know—company policies, product details, FAQs, or whatever fits your use case. The beauty of Estha is that your bot will automatically understand and be able to answer questions about whatever information you provide.
Define Bot Personality and Responses
Now let’s give your bot some character:
1. Navigate to the “Personality” section in the editor
2. Define how your bot should introduce itself
3. Set the tone of communication (professional, friendly, humorous, etc.)
4. Configure how it handles unknown questions
5. Add any specific phrases or responses for common interactions
Remember, your bot’s personality should align with your brand voice and the context in which it will operate. A customer service bot might be warm and helpful, while a team productivity bot might be more direct and efficient.
Step 3: Connecting Your Slackbot to Slack (5 minutes)
With your AI application built in Estha, it’s time to connect it to your Slack workspace:
Configure the Integration
1. In the Estha editor, navigate to the “Integrations” tab
2. Select “Slack” from the available integrations
3. Enter the Client ID and Client Secret you obtained from Slack’s developer portal
4. Choose which Slack events should trigger your bot (direct messages, mentions, specific channels, etc.)
5. Click “Connect to Slack” and authorize the connection when prompted
Set Bot Activation Parameters
Define how users will interact with your bot:
1. Configure whether your bot responds to:
– Direct mentions (@yourbot)
– Messages in channels it’s invited to
– Direct messages
– Specific trigger keywords
2. Set up any command prefixes (like “/assist” or “/help”)
The right configuration depends on how you want your bot to behave. For a customer service bot, you might want it to respond to any message in a #support channel. For a team assistant, you might prefer it only responds when directly mentioned to avoid unnecessary interruptions.
Step 4: Customizing Your AI Slackbot’s Capabilities (5 minutes)
Now let’s enhance your Slackbot with specialized capabilities using Estha’s drag-drop-link interface:
Add Functional Skills
In the Estha editor, locate the “Skills” section where you can add specialized capabilities:
1. Drag and drop skill modules from the sidebar into your project
2. Popular skills for Slackbots include:
– Information Retrieval: Quickly find and share documents or answers
– Meeting Scheduler: Help coordinate team meetings
– Task Creator: Allow users to create tasks in project management tools
– Data Summarizer: Summarize conversations or documents
– Process Guide: Walk users through specific procedures
Create Custom Workflows
For more advanced functionality, you can create custom workflows:
1. In the “Workflows” section, click “Create New Workflow”
2. Define the trigger for this workflow (e.g., when someone types “help with invoice”)
3. Add action steps using the visual workflow builder
4. Connect actions with decision points and conditions
5. Test your workflow in the simulator
For example, you might create a workflow that helps team members find and share the latest sales numbers. When triggered, the bot could ask which product line they’re interested in, retrieve the latest figures, and format them into a neat Slack message with charts.
The power of Estha is that all this functionality can be created without writing a single line of code—just drag, drop, and link elements together in a visual interface.
Step 5: Testing and Refining Your Slackbot (5 minutes)
Before unleashing your bot to the wider team, let’s make sure everything works as expected:
Run Initial Tests
1. In your dedicated Slack testing channel, mention your bot with a simple question
2. Verify that it responds appropriately
3. Test each of the core functions you’ve designed
4. Try some edge cases to see how the bot handles unexpected inputs
Refine and Improve
Based on your testing, you may want to make some adjustments:
1. Return to the Estha editor to fine-tune your bot’s responses or knowledge
2. Add additional information to help with questions that weren’t answered well
3. Adjust the personality settings if the tone isn’t quite right
4. Enhance workflows that didn’t perform as expected
One of the advantages of building with Estha is the ability to make changes quickly. You don’t need to redeploy code or wait for developers—just make your adjustments in the visual editor and they take effect immediately.
Deploy to Your Team
Once you’re satisfied with your bot’s performance:
1. Invite your bot to the relevant Slack channels
2. Send an announcement to your team explaining:
– What the bot can help with
– How to interact with it
– Where to report issues or suggest improvements
3. Consider creating a quick-start guide for common commands or questions
Congratulations! In just 30 minutes, you’ve created, tested, and deployed a custom AI Slackbot tailored to your specific needs—all without writing a single line of code.
Real-World Applications for Your AI Slackbot
Now that you’ve built your bot, let’s explore some practical ways it can add value to your organization:
Customer Support Assistant
Configure your bot to monitor support channels and provide immediate responses to common questions. For complex issues, it can collect initial information before routing to a human agent, saving valuable time in the support process.
Team Knowledge Base
Upload your company documentation, policies, and frequently accessed information. Team members can then ask questions in natural language and receive accurate answers instantly, rather than searching through folders or interrupting colleagues.
Meeting Facilitator
Set up your bot to take meeting notes, distribute action items, and send reminders for upcoming meetings. It can even help coordinate scheduling by checking participants’ availability.
Onboarding Guide
Create a bot that walks new team members through onboarding processes, answers common questions, and provides resources without requiring constant human supervision.
Project Management Assistant
Configure your bot to create tasks, provide project status updates, and remind team members of approaching deadlines—all through natural conversation in Slack.
The applications are endless and can be tailored to your specific industry or team needs. The best part is that your bot will continue to learn and improve over time as it interacts with more team members and accesses updated information.
Troubleshooting Common Issues
Even with a no-code platform, you might encounter a few bumps along the way. Here are solutions to common challenges:
Bot Not Responding
If your bot isn’t responding to messages:
1. Check that it’s been properly invited to the channel
2. Verify that your Slack integration credentials are correct
3. Ensure you’re using the correct mention format (@yourbot)
4. Check Estha’s connection status in the integration panel
Inaccurate or Unhelpful Responses
If your bot isn’t providing good answers:
1. Review and enhance the knowledge base you’ve provided
2. Check if the questions are clearly formulated
3. Consider adding more specific examples or training data
4. Adjust the response format in the personality settings
Workflow Errors
For issues with custom workflows:
1. Use the workflow testing tool in Estha to debug step by step
2. Check that all connections between workflow elements are properly configured
3. Verify that any external services or APIs are accessible
4. Simplify complex workflows to isolate the problem
Remember that Estha’s platform is designed to be accessible to non-technical users, so most issues can be resolved through the visual interface without needing to understand complex error codes or debugging techniques.
Conclusion
In this guide, we’ve walked through creating a powerful AI Slackbot in just 30 minutes without writing a single line of code. Using Estha’s no-code platform, we’ve built a custom AI assistant that can transform how your team works, communicates, and accesses information.
What makes this approach revolutionary is not just the speed of development, but the accessibility. You don’t need a technical background, AI expertise, or programming skills to create sophisticated AI applications that solve real business problems. With drag-drop-link simplicity, anyone can now harness the power of artificial intelligence for their specific needs.
As you continue working with your bot, consider expanding its capabilities by adding more knowledge, refining its responses, and creating additional workflows. The more you customize it to your specific context, the more valuable it becomes to your team.
AI doesn’t have to be complex or intimidating. With tools like Estha, it’s becoming as accessible as creating a spreadsheet or presentation. The future of work isn’t just about having AI—it’s about having AI that’s perfectly tailored to your unique needs and workflows.
Ready to create your own custom AI Slackbot? The journey from idea to implementation is shorter than you think.
Ready to build your own AI Slackbot?
Start creating your custom AI applications today—no coding required.